Showing posts with label Distress Ink. Show all posts

Friday, 24 March 2017

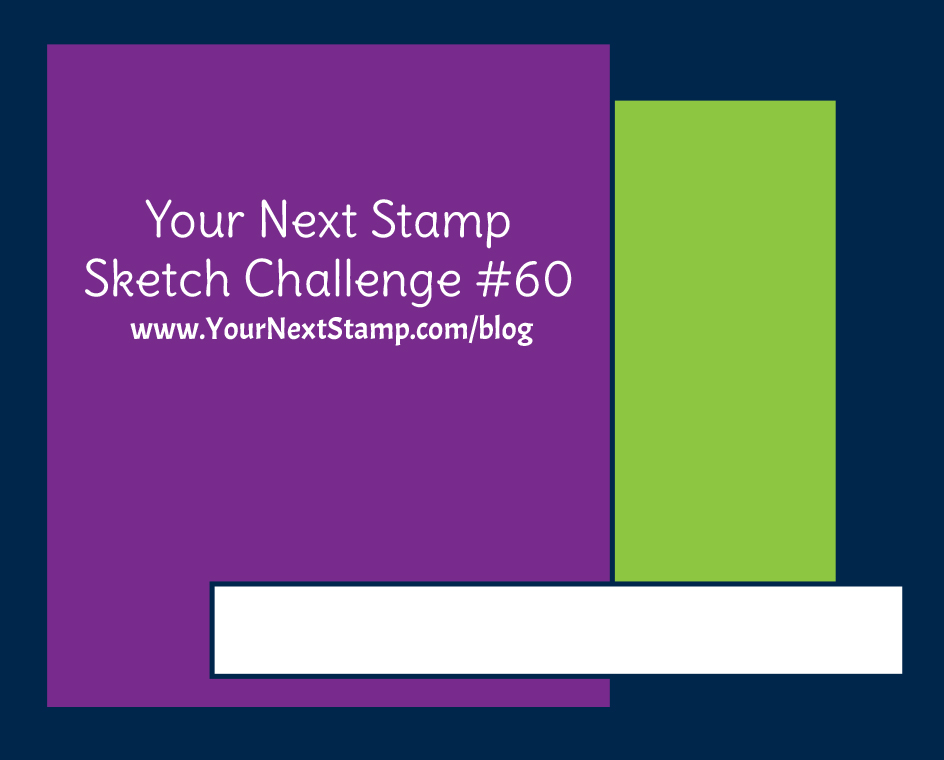
Sketch and Color Challenge #60 - Your Next Stamp


Hi friends !

Today is my last day as guest for Your Next Stamp. Time flies by super fast when you were busy having fun. It had been a wonderful time for me and I am very happy and thankful for this opportunity. YNS team - you will be missed ! 😊

Today I am up on their blog for their color and sketch challenge #60. You still have a week to join in the fun and a chance to win gift certificate to shop at YNS store. I will love to see your creations ! If you need more inspirations, be sure to head down to their blog and you will find many fabulous projects done by YNS design team and guests. 

Meanwhile, let's take a look at their awesome color palette and sketch layout. 


My card today features a combination of YNS Stacked with Fun stamp set, All Aboard train carts and Little ledges die set. I love these cute faces and they also remind me of circus animals.


To start off, I stamped all the images using Memento Tuxedo black ink onto a white card stock and colored them using distress markers. These were fuzzy cut using scissors.


For the card panel, I stenciled red stripes across the card using mama elephant red apple pigment ink. To give the panel a dimensional look, I embossed it using the next level 3D embossing folder - stripes from We R memory keepers.


Following the sketch, I used YNS Stitched square die to cut our a square frame and window using pattern papers in my stash. I also die cut a scallop ledge and rectangle with circle piece using YNS Little Ledges die set. For the sentiment, I stamped onto white card stock and trim it down into a banner strip with fish tail.


To assemble the card, I first adhered the background panel onto a top folding horizontal card base. Next, I used foam tape to stick down the yellow frame followed by the dark brown inner square piece. I then glued down the ledges followed by the grass and flowers patches and stacked on the animals using foam tape. To finish off the card, I adhered the sentiment banner and added glossy accents to the lion's and monkey's nose and the elephant's and donkey's hooves.

Thank you all for stopping by. Have a fun and wild day !

Hugs
Amy

Sunday, 19 March 2017

Hi Beautiful - Honey Bee Stamps


Hi beautiful people!

I am super excited and honoured to be on Honey Bee Stamps blog today. Here is a card featuring the Hello Gorgeous stamp set which comes with many beautiful rustic floral images and large sentiments.

I love the rustic florals and antler images on this stamp set because they are very versatile and are great for making cards for any occasion. I wanted a rustic look so I went for textures and a muted color palette. Here is my card.


I started off by stamping two of the same floral images and two arrows onto watercolour cardstock using Versafine Onyx black ink and lightly water coloured them using distress inks. I also stamped the large “hi” sentiment on a white card stock and clear embossed it to make it more defined. With their coordinating dies, it was a breeze cutting them out. I stamped the word “beautiful” onto a black card stock strip and white heat embossed the word for contrast. Then, cut a fish tail at one end of the strip.


For the card panel, I cut a 3 ¾ inch x 5 ½ inch white card stock and embossed it with weathered design embossing folder from Taylored Expressions. Then I taped a 1/8 inch black card stock strip and a one inch grey textured card stock onto the right side of the embossed card panel. This creates a 4 ¼ inch x 5 ½ inch card panel.

To assemble the card, I glued the card panel onto a side folding Neenah solar white 110lbs card base. The floral images were adhered towards the right bottom of the card. Then, the two arrows were cut at the center and the heads and tail were separately tucked under the florals giving a lengthened look.
Finally, I glued down the sentiments using mono glue and added some glitter onto the florals using wink of stella clear glitter pen. And, the card is done!

Thank you for stopping by. Hope you like this and have a great day!

Love,
Amy 


Thursday, 16 March 2017

Newton strums a birthday song - entry for Inky Paws Challenge #42

Hi fellow crafters !

Today I'm taking on the Newton's Nook Designs Inky Paws Challenge. Their theme is Birthday ! Oh... I love birthdays because it is filled with cakes, parties, friends and BIRTHDAY SONG ! So much fun ! 

Going through my Newton Nook's stash, I realised that I do not have a birthday themed stamp set ! :( 

I cracked my brains hard and thought there should be something I could use for a birthday themed card. So, finally, I settled for the Aloha Newton stampset which I have yet used. I think Newton holding a Yukelele is just perfect! Newton strumming a Birthday Song would be so cute !! Here is my one layer card 😀 I love how this turned out ! 


First I started off creating the rainbow using a self made stencil and inked each layer using distress inks (abandon coral, fossilised amber, mowed lawn, broken china, seedless preserve) and covered each line as I blend using finger dauber sponge onto Bristol smooth card stock.


The clouds are then blended using mini ink blending tool with broken china distress inks and the bottom part of the card with cracked pistachio distress ink. I sprinkled some water droplets onto the card to create some water distress marks on my card.

Then, I stamped Newton using Memento Tuxedo Black ink and masked him before stamping the heap of flowers and leaves under him. I colored them in using copic sketch markers and outlined with copic multiliner 0.01 black pen.


Next, I positioned the sentiment from MFT birthday bears stamp set along the rainbow curve and stamped it using versafine onyx black ink. Using the musical notes from Mama Elephant Rock and Paws stampset, I stamped them randomly over and onto the rainbow using Versafine Onyx black ink and filled in the symbols with black marker.


Finally, I highlighted the musical notes with Sakura white gelly roll pen to give them a glossy look. Die cut this front panel with MFT wonky stitched rectangle die and adhered it directly onto a top folding horizontal Neenah Crest Solar White 110 lbs card base. And, my card is done ! 😇


Thank you all for stopping by. Hope to see you back again !

Hugs
Amy

Hello Gorgeous - Honey Bee Stamps

Hello Gorgeous Friends ! 

Today I have another card created using Hello Gorgeous stamp set from Honey Bee Stamps. I truly love the many floral images in this set which I could use to make cards for many occasions.


To start off, I layered two floral images using masking technique and stamped them onto an A2 card size watercolor cardstock. I then used distress inks to watercolor the images and outline the images using Sakura Pigma micron .01 black pen to give more contrast to the image.

Then, I ink blended the background using mini blending tool with scattered straw distress ink. For a more dimensional look, I created shadow using my Copic marker W01, W03 under the florals. For the sentiments, I gold embossed the word HELLO above and word Gorgeous with Versafine Onyx Black Ink.


Then, trimmed both sides of the card panel using my paper trimmer and scissors. This was then glued on top of a layer of textured brown cardstock and shimmering peach card stock at the bottom layer.


Lastly, I attached the front panel onto a top folding card base to finish off the card.

Thanks for stopping by. Have a gorgeous day everyone !

xoxo
Amy

Monday, 13 March 2017

Thanks a Log - guest design for Honey Bee Stamps


Hello stampers !

I am so excited and honoured to be invited as guest designer for Honey Bee Stamps this month. They are a USA company selling buzzworthy stamps, dies and paper craft supplies owned by the talented Melissa Hewitt who also designs her own stamps.


Here is my first card using the Spring Honey Buddies and Hello Gorgeous stamp sets which also come with their coordinating dies.


I love the wood slice images and stamped all the different sizes of wood slices available in the stamp set while masking them if needed onto watercolor paper. Then, I used distress ink to watercolor them in to create a more realistic look. I put them together randomly onto a white card stock and colored in the white spaces using pumice stone distress ink.

I die cut an oval window with frame using woodgrain card stock and laid this over the wood slices panel.


I stamped the bunny and floral images onto Neenah crest solar white card stock 80 lbs with memento tuxedo black ink and colored using Copic markers. I stamped the sentiment and die cut it slightly off centre to get a more dimensional look.

I taped everything over the frame using glue and foam tape. Lastly, added some glossy accents onto the flower center and bunny paws and my card is done !


Thanks a log for stopping by ! Have a fabulous day !

Hugs
Amy


Friday, 10 March 2017

Sketch and Color Challenge #59 - Your Next Stamp

Happy Friday ! Hope everyone had a great week so far. 

I'm up on Your Next Stamp blog as a guest designer for their Color and Sketch challenge #59. It's another great color and sketch challenge this week and I hope you will join in the fun. Head down to their blog to see many awesome inspirations by the design team and guests and have a chance to win YNS gift certificate if you play along!


Today, I am sharing with you two fairy cards inspired by this week's challenge.

My first card is an interactive one which features YNS Fairytale Homes stamp set. Catch a short video clip at the bottom of this blog to see this fun card in action!


Watercolor is perfect in creating mystical looking cards like this. I started off by inking up the image onto Canson XL watercolor card stock with distress ink - tumbled glass. Then, colored in the image and create a background using distress ink watercoloring leaving an inch at the bottom uncolored.


The fairy image is stamped on similar watercolor card stock, watercolored using distress ink markers and fuzzy cut to the edge. For the interactive component, I cut a strip of acetate and taped an end to the fairy. Try it out on the background panel to determine the length of the acetate strip.

Adhere the acetate at the bottom center using a mini brad. Cover up the bottom with a strip of kraft and hot pink card stock adhered down using foam tape. The sentiments were white heat embossed on the kraft strip before adhering.
Final touches, add some glossy accents on the fairy crown and wand and clear glitter on all the pink images using Spectrum Noir clear glitter pen.  This card is done !


Click here to see a short video clip on my IG. 👀

Here is my second card featuring the Fairy Dust and All Aboard Bunch of Happiness stamp sets. I really love how sweet this turns out. 😄


I ink blended a white card panel using MFT premium dye inks (sno cone, limeade) and used the largest of YNS stitched rectangle die to cut down the panel. Stamped the images using memento tuxedo black ink and copic color them. Also, I've die cut some fences using the YNS lamp post and fence die set. I used Neenah crest solar white 110 lbs for card panel and 80 lbs card stock for the images. Wood pattern paper for the fences.


A slit is cut at the bottom the tulip images were tucked in and glued on using tape adhesive and the center one taped down using foam squares. I added some glossy accents on them too. The sentiments were embossed using Teal color ZING embossing powder.


The fairy image is then taped using foam squares and added shine using Spectrum Noir clear glitter pen and glossy accents. I then stamped the fairy dust using distress ink color - seedless preserve and embossed it with sparkling clear embossing powder.


Finally, I adhered the fences and add some YNS enchanted garden gumdrops.


Finally, I tied a plum color embroidery floss around the fence and glued on a bow. Then, attached the front panel to a vertical top folding card base and my card is finished !


Thank you for stopping by. Hope you are inspired and looking forward to see your fabulous creations!

XOXO,
Amy

Monday, 6 March 2017

Droppin' in to say... I Miss U - MarkerPOP challenge #115

Hello !

Oh well, it's Monday greys... Haha... I have my first grey card to share with you today, inspired by MarkerPOP color challenge #115 - shades of winter. What a fun and challenging theme! This is quite a challenge for me because colorful cards are my usual style. But, I always LOVE a good challenge to start off a new week. 😁


Here is my take on MPC 115 using the cute panda image from Wplus9.


Using Wplus9 Friends for all seasons - Spring set, I stamped the adorable Panda and one little bird onto a white card stock using Memento Tuxedo black ink. I use copic color C3 to slightly colored in some shadows on both images and cut them out using scissors.


I die cut a lamp post and fence using YNS Lamp and Fence die and use white gelly roll pen to add some highlights to the lamp post.


For the background panel, I used mini blending tool to ink blend a piece of A2 card size watercolor card stock with distress ink colors weathered wood, ice spruce and black soot. Blending starts from the sides moving inwards. This was then die cut using the largest of MFT wonky stitched rectangle die.


To make the lamp light more contrasting, I used embossing pen to loosely scribble in a circular motion and white heat embossed it.


To assemble the card, I glued down the fence, the lamp post and the birdie using my glue pen. Then, white heat embossed my sentiment above the fence. Lastly, I used foam tape to attach the cute panda beside the lamp post. Attach the whole panel to a top folding horizontal card base. And, my card is finished !


Thank you all for stopping by. Hope you guys won't ever be grey like Panda. Have a FUNfilled week ahead !!


Cheers,
Amy


Sunday, 5 March 2017

Your Next Stamp - March 2017 New Release Blog Hop

Welcome back, my fellow stampers ! 🙋

I'm so happy that you have joined us today because you won't want to miss all the awesome goodies up on Your Next Stamp new release day ! Woot! Woot!

Today marks the start of YNS new release Blog Hop featuring more fabulous projects by Your Next Stamp design team and guests. You can feast your eyes on many new adorable stamp sets and dies and how various designers use them brilliantly in their creations.

The Blog Hop starts now and ends March 7. Be sure to hop along and leave your comments for a chance to win a $25 gift certificate! You do not have to comment on every blog, BUT...the more comments you leave, the higher your chances of winning ! Good Luck my friends !!


Everything is super cute this month but if I have to choose, my favorite has to be the All Aboard - Spring cart add on. This set is fabulous with little chickies, egg carts and accessories that are too cute to pass for a fun Easter/Spring card. I could match this set with the other All Aboard series stamp sets which include the All Aboard set, Train carts and Bunch of Happiness add on! With all these, the possibilities are just endless! You can mix and match to create so many different scene cards that are great for the whole year. I had a blast using these and am sure you would LOVE them too! 😊

Here is a tri-fold card I've made using a combination of these stamp sets. There are so many cute little images that I love and had to put them all in a card. Fun and cuteness all in one ! Oh yeah ! 😁


For the card base, I used watercolor card stocks which I would usually use for distress ink blending. I cut a 8.5" x 11" size card stock to create a standard A2 size side folding card base. Then I cut a 4.5" x 5.5" piece and scored 1/4" on its side, fold on the scored line and align the line to the A2 size card base to make it into a tri-fold card.

For the card base background, I used mini ink blending tool to ink blend the card base using distress inks (color - spun sugar, tattered straw, mowed lawn, tumbled glass). I made a cloud stencil using YNS Puffy Cloud border die and stencil the sky with tumble glass distress ink.


Using white card stock, I die cut railway tracks using YNS fence die which I trimmed at its pointy sides and connected them to form one long track covering the whole length of this card. Or, you could simply use their new Train track die to save time and trouble. 👍


I stamped all the images on regular water color card stock using Versafine Onyx black ink and water color them using distress inks. These were then fuzzy cut out using my dainty scissors. 😊


I cut a slit around the egg cart window and tucked the chicks and peep in. Using Mono liquid glue, I glued down all the images and let them dry completely. I stamped the sentiments using Versafine onyx black ink and clear embossed them for a more defined look. On the background panel, I stamped the butterflies outline and glued down their wings. Gave shine to those butterflies and flower petals using my Spectrum Noir clear glitter pen. Lastly, some glossy accents around the wheels, train frame, flower center and the chicks' beak. And, my card is DONE ! 😊


No new release with YNS goes without an Awesome deal. You can now get everything on your wish list with a 20% OFF your entire purchase from now until March 9th midnight ! So don't miss out on this great offer! 


Thank you so much for stopping by. Have a HOPPY Weekend !! 😙

Love & hugs,
Amy