Showing posts with label Yournextstamp. Show all posts

Friday, 24 March 2017

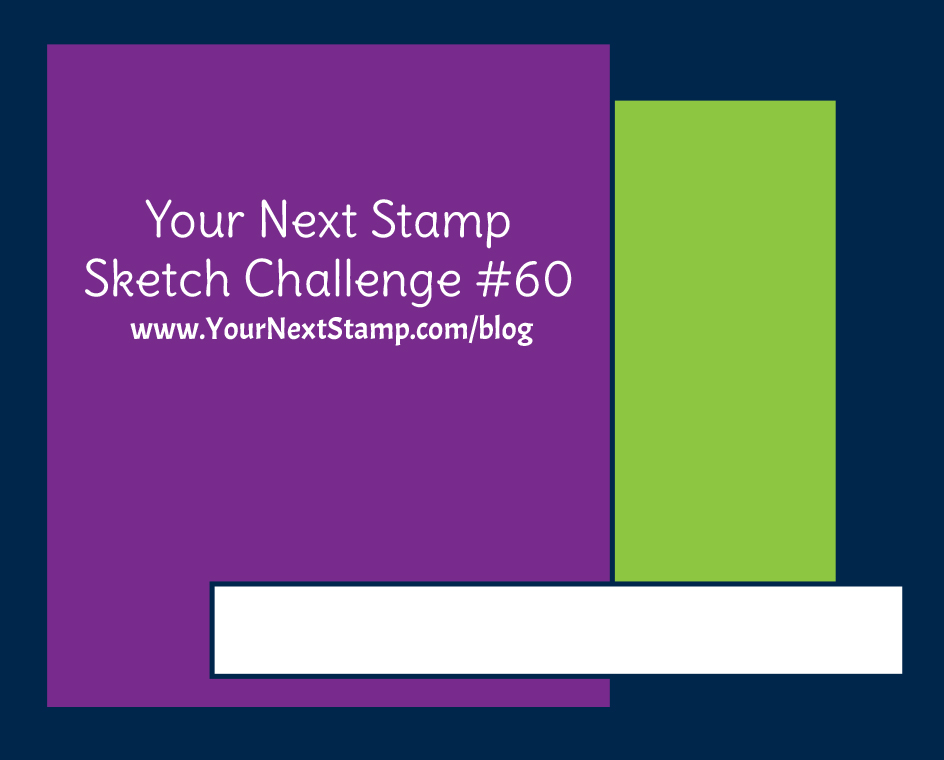
Sketch and Color Challenge #60 - Your Next Stamp


Hi friends !

Today is my last day as guest for Your Next Stamp. Time flies by super fast when you were busy having fun. It had been a wonderful time for me and I am very happy and thankful for this opportunity. YNS team - you will be missed ! 😊

Today I am up on their blog for their color and sketch challenge #60. You still have a week to join in the fun and a chance to win gift certificate to shop at YNS store. I will love to see your creations ! If you need more inspirations, be sure to head down to their blog and you will find many fabulous projects done by YNS design team and guests. 

Meanwhile, let's take a look at their awesome color palette and sketch layout. 


My card today features a combination of YNS Stacked with Fun stamp set, All Aboard train carts and Little ledges die set. I love these cute faces and they also remind me of circus animals.


To start off, I stamped all the images using Memento Tuxedo black ink onto a white card stock and colored them using distress markers. These were fuzzy cut using scissors.


For the card panel, I stenciled red stripes across the card using mama elephant red apple pigment ink. To give the panel a dimensional look, I embossed it using the next level 3D embossing folder - stripes from We R memory keepers.


Following the sketch, I used YNS Stitched square die to cut our a square frame and window using pattern papers in my stash. I also die cut a scallop ledge and rectangle with circle piece using YNS Little Ledges die set. For the sentiment, I stamped onto white card stock and trim it down into a banner strip with fish tail.


To assemble the card, I first adhered the background panel onto a top folding horizontal card base. Next, I used foam tape to stick down the yellow frame followed by the dark brown inner square piece. I then glued down the ledges followed by the grass and flowers patches and stacked on the animals using foam tape. To finish off the card, I adhered the sentiment banner and added glossy accents to the lion's and monkey's nose and the elephant's and donkey's hooves.

Thank you all for stopping by. Have a fun and wild day !

Hugs
Amy

Wednesday, 8 March 2017

March DT Dare "Shades of Spring" - Your Next Stamp

Hello my crafty friends ! 

Where I live, there is no four seasons. Our weather is very hot, humid and sunny with occasional rain/showers all year round. But, in other parts of the world, March is when Spring is approaching and people welcoming the warm weather and preparing for the upcoming Easter day celebration. 

Today I'm on YNS DT dare challenge featuring Shades of Spring. I perceived Spring as nice warm days, green fields, blooming flowers and a time filled with so much joy and happiness. I thought an Easter card with spring colors would fit perfectly for this theme. Using YNS March 2017 new release, here is my take.


I used mainly YNS All Aboard - Spring Carts stamp set to create this card.


First I stamped the chicks, Easter eggs and basket cart images onto a white card stock using memento tuxedo black ink. I colored them using copic markers. 

With my mini ink blending tool, I blend the background onto Neenah Crest Solar White 110lbs card stock, using MFT premium dye inks colors sno cone and in the buff. For the clouds, I created a cloud stencil using YNS Puffy cloud border die. The whole panel is then cut down using the largest of YNS stitched rectangle die.

Next, I used green copic to ink up a white card stock and die cut some grass using Lawn Fawn meadow borders die and trim the sides using YNS Stitched Line die. Taped down all the images onto the background panel and stamped my sentiments using Versafine onyx black ink and clear embossed. 


Finally, I glued on some clear and yellow sparkling sequins using multi medium matte adhesive and added glossy accents onto the eggs and wheels of the cart for some shine and dimension. I then attach the whole panel on a top folding horizontal card base and my card is DONE !

*** For your Chance to WIN ***


Be sure to head down to the YNS blog for your chance to WIN a YNS stamp set of your choice ! Simply leave a comment on their blog by March 10th at midnight EST. Winner will be announced on March 12th.


Thank you for stopping by. Have a happy Spring !!

Hugs,
Amy

Saturday, 4 March 2017

Your Next Stamp - March 2017 Sneak Peek Day !

Hi friends ! 

Woohoo !! The fun has finally begun. There are so many products at Your Next Stamp that I get super excited about this month. Their March 2017 new release is packed with so many adorable stamp sets that I promise will knock your socks off 😁! 

Today is SNEAK PEEK day!👀 I am up today to give you a preview of one of their new stamp sets this month. It is called Stacked with Fun. These faces are just adorable !  I sure went ga ga when I first see these cuties.😍 You can create so many different cards just with this set as it comes with many differet sentiments and mini speech bubbles for you to add to a card suited for that special occasion. 


Here is my card featuring this adorable set. 


Firstly, I stamped the animals on a standard A2 card size watercolor card stock using distress ink - tumbled glass as I would be doing watercoloring. 

This card required several masking. Basically, I have to stamp the front image first, mask them using post-it paper, then stamp the back image over the masking (if that make sense...) For example, I've stamped the animals, masked them, then stamped the presents below and slightly over the masking paper. The presents will now appear under the animals when the masks are removed.

.
I watercolored the images and used my Uni-ball signo Sparkling glitter pen in gold and silver to color in the ribbons and added details to the presents. Their eyes and mouth were darken using Sakura black micron pen 0.01 and little white dots to their eyes using Sakura white gelly roll pen.


For the sentiments, I gold embossed on a fish tail strip of turquoise blue card stock that I had in my stash and cut down my front panel to 3-7/8" inches wide.


I cut a strip of pastel pink paper and kraft color card stock to layer behind my front panel using glue tape, adhere the sentiment at the top right using foam tape. Lastly, taped my front panel onto a top folding card base and my card is DONE !


Thank you all for stopping by.

Click here to visit Your Next Stamp blog to get links to see more awesome new release previews by the rest of the design team and guests.

Be sure to come back tonight at 10:00pm EST for YNS New Release Blog Hop and your chance to win a $25 gift certificate!! 


See you back here SOON...Hope you have a wonderful day stacked full of FUN !!

Cheers!
Amy

Thursday, 2 March 2017

Believe in Unicorn - Your Next Stamp

Hi friends ! I adore Unicorns because they are different. I believe that it's ok to be different. Always believe in yourself and you too can suceed and make a difference. 

Today, I want to share a card I've made with Your Next Stamp - magical unicorns stamp set. I wanted it to be magical, where flowers bloom in spring and a unicorn happily prancing under the sunrays peeping through the middle of the magical forest. 


This is a one layer card. I stamped the unicorn onto an A2 size watercolor card panel using distress ink color - vintage photo and sketch the scene using a light blue watercolor pencil. Then, I started out by giving the images a light layer of watercolor and slowly add on darker colors to give contrast and shadows. 

For the flowers, I randomly stamped YNS Mini flower splatter set using distress ink and brush them over lightly with water to blend with the background. For more contrast, I used Ranger embossing pen to create small dots among the bushes and white heat embossed it to create little white flowers.

For the sentiments, I used the word "Believe" in YNS magical unicorn die set. The word was cut using white and black card stock with the black layered underneath the white to create some dimension.

For a softer background, I used a white color pencil to shade over the tree trunks as if rays of light shining onto the unicorn. Then, added clear sparkly sequins to give it some shine and interest. Finally, I have to add some glossy accents on its horn and hooves as finishing touches. And, my card is DONE ! 😉

Appreciate you taking time to stop by. Hope you love what you see. Have a unicorn kind of day !

Love,
Amy

Saturday, 25 February 2017

You're SPEC-tacular - Your Next Stamp

Hi lovelies ! Today I want to share with you this card that I had so much fun making. It is an interactive card which features the recent release from Your Next Stamp - Spec-tacular Phoebe and Friends stampset. I love that it comes with many spectacle frames sized to fit the adorable Phoebe and her little cute critter friends. Adding those spectacles just make everything look so much cuter ! Here is what I've created. Be sure to click on a link at the bottom of this blog to view a short video clip of this card in action !


First, I stamped the images at the center of an standard A2 sized white card stock using Memento Tuxedo Black ink, masking Phoebe before stamping the bunny and the teddy bear like so.


Using another white card stock, I die cut an oval window using the third largest of YNS stitched oval die. This is my top panel. Then, I colored in my images using Copic markers. 

As the top panel looked plain,  I've decided to decorate it with red polka dot pattern paper that matches the images. For some details and interest, I added a red oval frame using the same YNS stitched oval dies,  a red bow using YNS Bow-tiful Little Bows die and cut two red thin strips for the top and bottom of the card which gave it a more complete look.


For the slider panel, I stamped the spectacles onto some plain white sticker label and colored in using copic markers. As I do not have the co-ordinating dies, I fuzzy cut them out using scissors and my x-ecto knife. To make the slider panel, I cut a piece of acetate as shown in the blueprint below.

Orange shapes are the single layer foam tape. Red lines the shape of the piece of acetate that I cut. Red rectangle piece of red card stock taped to the bottom of the acetate panel.


To affix the spectacles that I had fuzzy cut out earlier, first, I slide the acetate panel all the way down, position the spectacles over the images and stick them down. I used glossy accents to add shine and dimension to the spectacles. Finally, I white heat embossed the sentiments onto the red piece of card stock on the bottom of the acetate and the card is finished! 😁


Click here to view 👀short video clip of this card ! 

Thank you for stopping by and taking time to read my blog. Have a SPEC-tacular day !!

Hugs,
Amy


Tuesday, 7 February 2017

Sweet Wishes - YNS Challenge #57

Hi my sweet friends ! The best things in life is always sweet. Don't you think? I love to bake muffins and cupcakes and definitely love eating them too 😋. Your Next Stamp - Jessica with cupcake - stamp set is perfect and this is what I've came up with.


I was inspired by YNS Sketch and Color challenge #57.


I stamped and colored the images using Distress Ink onto Canson XL watercolor card stock and used YNS Stitched square (third largest) die to cut out top part of Jessica. The other 2 cupcakes were fuzzy cut out using scissors.


Cut a small strip of wood grain pattern paper and white heat embossed the sentiments.


Added glossy accents onto the heart and cherries for a little bit of dimension and gloss.


Starting with a prune color card stock, I used YNS stitched rectangle largest die to cut out my base. Then, embossed polka dots using Taylored Expressions embossing folder. I assemble my card according to the sketch layout, added foam tape to the sentiment strip and 2 cupcakes at the right for extra dimension and interest. And, my card is finished. 😄


Thanks for stopping by and I hope you have a sweet day !!

xoxo,
Amy

Tuesday, 29 November 2016

Day 29. You make me so HAPPY

Hello my crafty friends ! Today I'm taking on YourNextStamp Sketch and Color challenge #53 with this cute slider card using YourNextStamp stampset and dies. 

ynssketch53

ynscolor-53


I've used the cute puppy from the stamp set Love and Smiles to create this card. I've stamped the image on Neenah Solar white card stock using Memento tuxedo black ink and colored it using my Copic sketch markers. Then, I fuzzy cut the image out leaving a white border around. 

For the slider part, I've used the Slider/Spinner Die from YNS to cut out the slider and disc and glue them onto the puppy using multi medium matte.

For the bottom black and red panel, I stick them on using double sided adhesive tape. The Top slider panel using 4 layers of foam tape.


Heat embossed using WOW opaque white embossing powder the sentiment "You make me so hoppy" which is in the Love and Smile stampset on a black card stock.


Added some Glossy Accents onto balloons.

I have to add some glitter using my ZIG wink of stella clear glitter pen onto the hearts.


And here is the finished card for today. Below is a video of this card in action.


Thank you for stopping by. Hope you have fun and do leave me a comment. I would love to hear from you.

XOXO
Amy 😀