Showing posts with label Your Next Stamp. Show all posts

Wednesday, 9 August 2017

Your Next Stamp - DT Dare New Release - Color Me Happy

Hello friends !

This month's DT Dare theme is "Color Me Happy". 

I am super excited because I love colors ! Whenever I am asked what my favorite color is, I would stutter and have a hard time deciding. That is because I love ALL the colors of the rainbow !! 😀

Here is my take on this challenge using new release stamp set - Let's Paw-ty !


I stamped the bunny image and masked it before stamping on the balloons. To create a huge bunch of balloons, masked the front balloons before stamping the back ones and continue to mask and stamp until the desired quantity is attained. I chose a simple birthday sentiment "HB2U" because I wanted the focus be on the balloons.


I picked five colors (red, blue, yellow, green and orange) and colored the balloons using copic markers. I layered the colors over the balloons to create a translucent effect. Using YNS stitched rectangle die, I die cut the card front and adhered it onto a top folding vertical card base using foam tape. Lastly, I added glossy accents onto the balloons for a more dimensional look and that finished off the card. 

Before you go, don't forget to click here to visit Your Next Stamp blog to get links to see more awesome projects done by other designers and guests. Remember to leave your comments for a chance to win a stamp set of your choice. Comment must be left by August 11th at midnight EST. Winner will be announced on August 13th.

Thank you for stopping by. Have a colorful kind of day !!

Amy

Sunday, 6 August 2017

Your Next Stamp - August 2017 New Release 8th Birthday Celebration Blog Hop !

Hi friends, 

Woot! Woot! Welcome to YNS August New Release 8th Birthday celebration blog hop!! Let the Paw-ty begin !! 

To celebrate their 8th birthday this month, YNS is giving away a bigger prize of $80 gift certificate to one lucky hopper!! This is something not to be missed. So, be sure to join in the Blog Hop starting tonight at 10pm (EST) and ending on August 8th at 12 midnight (EST). Simply leave your comments as you hop along. Winner will be announced on the YNS blog on August 10th. 

That's not all...There will also be a PARTY GAME going on throughout the hop. All you need to do is to count the number of gumdrops as you hop and enter the total in the Party Game inlinkz on the YNS blog at the end of the hop.  One random entry with the correct number of gumdrops will win 10 packages of gumdrops!!! If no one has the correct number then the closest without going over will be used to draw the winner. 


YNS is also offering 20% off your entire purchase during the blog hop period! Just type in the online code before you check out. So hurry, this is the best time to fulfill your wishlist and grab those new YNS stamp sets and/or other items that you've been longing for! New Release is available in store from 10 pm on August 5th.


Today, I am featuring this adorable birthday card created using YNS new releases "Let's Pawty" and the Bold Happy Birthday word die.


The "Lets Paw-ty" stamp set is my favorite.  The fact that it has many adorable pet images makes it ideal for creating adorable cards that everyone would love. Accompanied by many accessories such as presents, cakes, balloons and flowers, the possibilities are just endless. You can mix and match to create so many different birthday cards with just one stamp set!! 

To make this card, I started off by placing the smaller of the birthday word die onto a white card stock and partial cut the words upwards 95% of the way only and used x-acto knife to trim off the sides. Then, I stamped the images above the words using Memento Tuxedo black ink and colored using copic markers. 

On a standard A2 size watercolour card stock, I used distress inks (milled lavender, spun sugar, abandon carol, squeezed lemonade, mowed lawn, salty ocean) to blend a rainbow background. 

Both card stocks were die cut using YNS stitched rectangle die and adhered together using double sided tape and affixed onto a top folding horizontal card base. 

Lastly, I added black glossy accents onto the eyes and nose to define the features and finished off by adding shimmer to the presents using clear wink of stella glitter pen.

Thank you all for stopping by. Don't forget to join the blog hop to have a chance to win amazing prizes. Hope you have fun hopping and get lucky this time !!

XOXO, 
Amy


Sunday, 9 April 2017

MarkerPOP Challenge #118 Guest Designer - Watercolor


Hi friends ! I am both excited and honored to be invited by MarkerPOP to guest design for their challenge this month. Theme is Watercolor People & Animals.

Here is my card featuring the bee from the Quirky animals set three (a retired set unfortunately) by Your Next Stamp. I watercolored the whole card using distress inks.


I started off by stamping the image onto a A2 card size watercolor paper and multiple stamped the flower to create a flower garden scene. I lightly colored the images and slowly layered the colors in to create contrast and shadows. I outlined the black stripes of the bee body using Sakura black pigma micron 0.03 pen.


I stamped the sentiments using Versafine Onyx black ink and die cut the completed panel using MFT wonky stitched rectangle die. Then, I embellished the card with some shiny sequins in my stash and adhered the panel onto a top folding A2 size white card base to finish off the card.


Hope you like what you see here.

Thank you all for stopping by. Have a beautiful day everyone !

Cheers
Amy

Friday, 24 March 2017

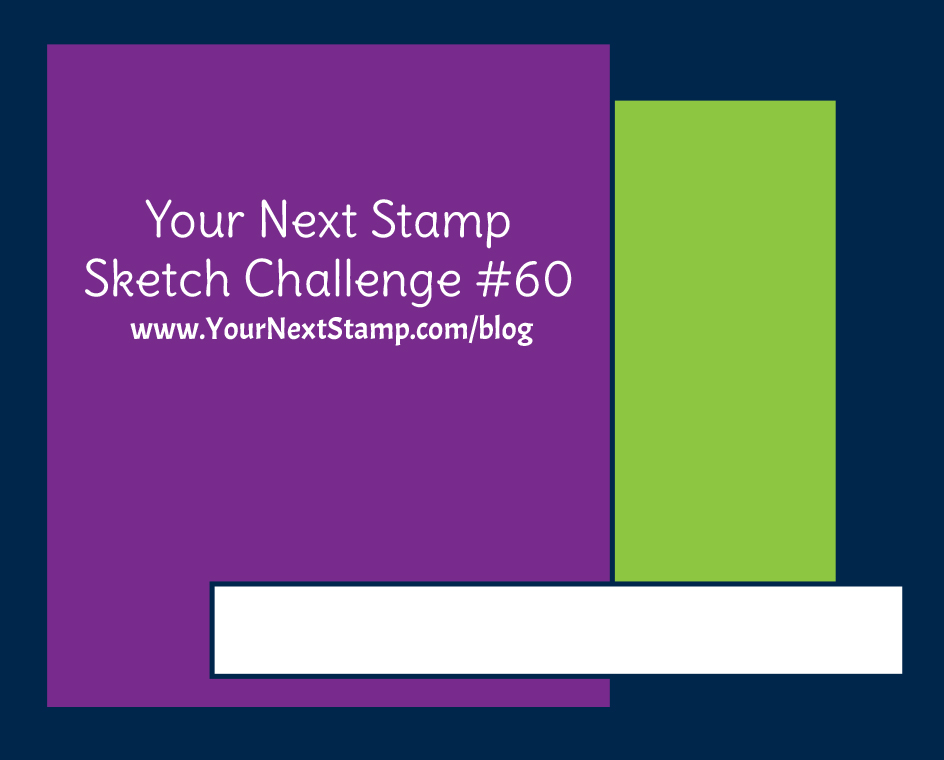
Sketch and Color Challenge #60 - Your Next Stamp


Hi friends !

Today is my last day as guest for Your Next Stamp. Time flies by super fast when you were busy having fun. It had been a wonderful time for me and I am very happy and thankful for this opportunity. YNS team - you will be missed ! 😊

Today I am up on their blog for their color and sketch challenge #60. You still have a week to join in the fun and a chance to win gift certificate to shop at YNS store. I will love to see your creations ! If you need more inspirations, be sure to head down to their blog and you will find many fabulous projects done by YNS design team and guests. 

Meanwhile, let's take a look at their awesome color palette and sketch layout. 


My card today features a combination of YNS Stacked with Fun stamp set, All Aboard train carts and Little ledges die set. I love these cute faces and they also remind me of circus animals.


To start off, I stamped all the images using Memento Tuxedo black ink onto a white card stock and colored them using distress markers. These were fuzzy cut using scissors.


For the card panel, I stenciled red stripes across the card using mama elephant red apple pigment ink. To give the panel a dimensional look, I embossed it using the next level 3D embossing folder - stripes from We R memory keepers.


Following the sketch, I used YNS Stitched square die to cut our a square frame and window using pattern papers in my stash. I also die cut a scallop ledge and rectangle with circle piece using YNS Little Ledges die set. For the sentiment, I stamped onto white card stock and trim it down into a banner strip with fish tail.


To assemble the card, I first adhered the background panel onto a top folding horizontal card base. Next, I used foam tape to stick down the yellow frame followed by the dark brown inner square piece. I then glued down the ledges followed by the grass and flowers patches and stacked on the animals using foam tape. To finish off the card, I adhered the sentiment banner and added glossy accents to the lion's and monkey's nose and the elephant's and donkey's hooves.

Thank you all for stopping by. Have a fun and wild day !

Hugs
Amy

Wednesday, 22 March 2017

March Feature Day - Laughter is the Best Medicine - Your Next Stamp

 Hello crafters !

It's feature day at Your Next Stamp ! The theme today is... Laughter is the best medicine ! HAHAHA !! 😁 How fun ! You are going to love this one !!

Here is my take. I used mainly YNS Silly Monsters stampset. This set is always my go to stamp set for a fun and silly card that will surely bring smile to any recipient because it has the cutest monsters bearing the quirkiest and widest smile !! 😁 I've decided to make it interactive and fun !


Using Neenah crest solar white 110lbs card stock as my panel, I positioned where I wanted the action to be and stamped on the sentiments using versamark ink and black heat emboss it. 

Next, I stamped on two monsters each at the bottom left and right and masked them before stamping the middle one. I altered their eyes by drawing a slightly curved line to make them look happier using black Copic multiliner pen. For the fourth monster, I stamped it on a separate piece of white card stock and fuzzy cut it out. All images were colored in using Copic markers.


I masked the monsters on the card panel and ink blended the background using a circle stencil in my stash and MFT premium dye inks - sno cone, grapesicle, banana split, tickled pink, persimmon. 

For the spinner part, I position the third and fourth largest of YNS Circles with Stitching and piercing marks die around the sentiments and cut out a ring. At the same time, I die cut a spinner disc using YNS slider/spinner die set. I adhered the smaller circle onto the center of the larger one using a strong glue and let it dry completely.


To assemble the card, I adhered the front panel onto a top folding vertical card base using foam tape like so.


Next, I taped down the inner ring using my tape runner and placed the spinner disc along the outer ring track and adhered the sentiment circle at the center using foam tape.

Finally, I glued down the red monster onto the spinner disc using strong glue and let it dry completely.

For finishing touches, I sticked on some gum drops and added glossy accents onto the monster eyes for extra dimension and interest. And, the card is DONE ! Hope you like this.


Click here 👀 to view a short video clip of this fun card in action in my instagram post! 😁

Be sure to check out the other DT projects on the YNS Blog and leave a comment for your chance to win a stamp set of your choice !! 

Thank you all for stopping by. Hope you had fun and Be HAPPY always !!

Love,
Amy

Friday, 10 March 2017

Sketch and Color Challenge #59 - Your Next Stamp

Happy Friday ! Hope everyone had a great week so far. 

I'm up on Your Next Stamp blog as a guest designer for their Color and Sketch challenge #59. It's another great color and sketch challenge this week and I hope you will join in the fun. Head down to their blog to see many awesome inspirations by the design team and guests and have a chance to win YNS gift certificate if you play along!


Today, I am sharing with you two fairy cards inspired by this week's challenge.

My first card is an interactive one which features YNS Fairytale Homes stamp set. Catch a short video clip at the bottom of this blog to see this fun card in action!


Watercolor is perfect in creating mystical looking cards like this. I started off by inking up the image onto Canson XL watercolor card stock with distress ink - tumbled glass. Then, colored in the image and create a background using distress ink watercoloring leaving an inch at the bottom uncolored.


The fairy image is stamped on similar watercolor card stock, watercolored using distress ink markers and fuzzy cut to the edge. For the interactive component, I cut a strip of acetate and taped an end to the fairy. Try it out on the background panel to determine the length of the acetate strip.

Adhere the acetate at the bottom center using a mini brad. Cover up the bottom with a strip of kraft and hot pink card stock adhered down using foam tape. The sentiments were white heat embossed on the kraft strip before adhering.
Final touches, add some glossy accents on the fairy crown and wand and clear glitter on all the pink images using Spectrum Noir clear glitter pen.  This card is done !


Click here to see a short video clip on my IG. 👀

Here is my second card featuring the Fairy Dust and All Aboard Bunch of Happiness stamp sets. I really love how sweet this turns out. 😄


I ink blended a white card panel using MFT premium dye inks (sno cone, limeade) and used the largest of YNS stitched rectangle die to cut down the panel. Stamped the images using memento tuxedo black ink and copic color them. Also, I've die cut some fences using the YNS lamp post and fence die set. I used Neenah crest solar white 110 lbs for card panel and 80 lbs card stock for the images. Wood pattern paper for the fences.


A slit is cut at the bottom the tulip images were tucked in and glued on using tape adhesive and the center one taped down using foam squares. I added some glossy accents on them too. The sentiments were embossed using Teal color ZING embossing powder.


The fairy image is then taped using foam squares and added shine using Spectrum Noir clear glitter pen and glossy accents. I then stamped the fairy dust using distress ink color - seedless preserve and embossed it with sparkling clear embossing powder.


Finally, I adhered the fences and add some YNS enchanted garden gumdrops.


Finally, I tied a plum color embroidery floss around the fence and glued on a bow. Then, attached the front panel to a vertical top folding card base and my card is finished !


Thank you for stopping by. Hope you are inspired and looking forward to see your fabulous creations!

XOXO,
Amy

Sunday, 5 March 2017

Your Next Stamp - March 2017 New Release Blog Hop

Welcome back, my fellow stampers ! 🙋

I'm so happy that you have joined us today because you won't want to miss all the awesome goodies up on Your Next Stamp new release day ! Woot! Woot!

Today marks the start of YNS new release Blog Hop featuring more fabulous projects by Your Next Stamp design team and guests. You can feast your eyes on many new adorable stamp sets and dies and how various designers use them brilliantly in their creations.

The Blog Hop starts now and ends March 7. Be sure to hop along and leave your comments for a chance to win a $25 gift certificate! You do not have to comment on every blog, BUT...the more comments you leave, the higher your chances of winning ! Good Luck my friends !!


Everything is super cute this month but if I have to choose, my favorite has to be the All Aboard - Spring cart add on. This set is fabulous with little chickies, egg carts and accessories that are too cute to pass for a fun Easter/Spring card. I could match this set with the other All Aboard series stamp sets which include the All Aboard set, Train carts and Bunch of Happiness add on! With all these, the possibilities are just endless! You can mix and match to create so many different scene cards that are great for the whole year. I had a blast using these and am sure you would LOVE them too! 😊

Here is a tri-fold card I've made using a combination of these stamp sets. There are so many cute little images that I love and had to put them all in a card. Fun and cuteness all in one ! Oh yeah ! 😁


For the card base, I used watercolor card stocks which I would usually use for distress ink blending. I cut a 8.5" x 11" size card stock to create a standard A2 size side folding card base. Then I cut a 4.5" x 5.5" piece and scored 1/4" on its side, fold on the scored line and align the line to the A2 size card base to make it into a tri-fold card.

For the card base background, I used mini ink blending tool to ink blend the card base using distress inks (color - spun sugar, tattered straw, mowed lawn, tumbled glass). I made a cloud stencil using YNS Puffy Cloud border die and stencil the sky with tumble glass distress ink.


Using white card stock, I die cut railway tracks using YNS fence die which I trimmed at its pointy sides and connected them to form one long track covering the whole length of this card. Or, you could simply use their new Train track die to save time and trouble. 👍


I stamped all the images on regular water color card stock using Versafine Onyx black ink and water color them using distress inks. These were then fuzzy cut out using my dainty scissors. 😊


I cut a slit around the egg cart window and tucked the chicks and peep in. Using Mono liquid glue, I glued down all the images and let them dry completely. I stamped the sentiments using Versafine onyx black ink and clear embossed them for a more defined look. On the background panel, I stamped the butterflies outline and glued down their wings. Gave shine to those butterflies and flower petals using my Spectrum Noir clear glitter pen. Lastly, some glossy accents around the wheels, train frame, flower center and the chicks' beak. And, my card is DONE ! 😊


No new release with YNS goes without an Awesome deal. You can now get everything on your wish list with a 20% OFF your entire purchase from now until March 9th midnight ! So don't miss out on this great offer! 


Thank you so much for stopping by. Have a HOPPY Weekend !! 😙

Love & hugs,
Amy